 Disclaimer: We are not medical professionals. Consult your doctor for specific usage of this device for injury or illness.
The ErgoUP Leg Support will fit nearly any office chair. No tools are needed to setup the ErgoUP for use, and it should take only a few minutes to install.
First make sure all the parts included on the packing list are in your box.
Step 1 Assemble the ErgoUP
Insert the two Casters into the two legs, pushing firmly.
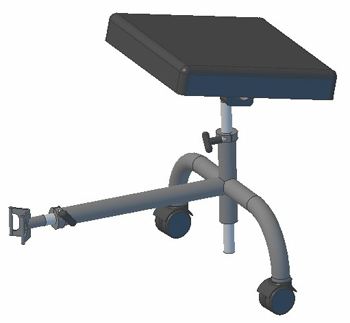
Holding the frame so the casters are on the floor, slide the T Post that is attached to the Cushion into the top center hole of the frame.
Be sure the Coupler with Velcro strap is inserted into Frame Base. Your ErgoUP should now look like the image to the left.
Step 2 Prepare Your Chair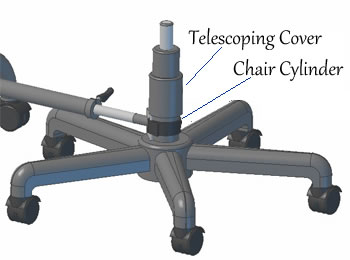
Most office chairs have a telescopic plastic sleeve that covers the main cylinder of the chair, normally there are three sections to the sleeve. You must slide the bottom section up to expose the cylinder, which is where the ErgoUP attaches to the chair.
Step 3 Installing the ErgoUP
Open the Velcro strap, leaving it threaded through the Coupler. Now wrap the strap around the chair cylinder and close the Velcro strap.
Step 4 Adjust the ErgoUP
First make sure your chair is properly adjusted. Now, set the
distance by sliding the Coupler in or out of the Frame Base so that the back edge of the pad is directly behind your knee. Tighten the Adjustment Knob to lock into position. (If the frame appears to be too small, an XL adaptor is available.) Next, adjust the height of the ErgoUP so that your knee is comfortable, and tighten Adjustment Knob below the cushion. It is recommended that the pad be positioned so that it is parallel along the leg and provides even support. Pressure points along the edge of a pad can restrict circulation
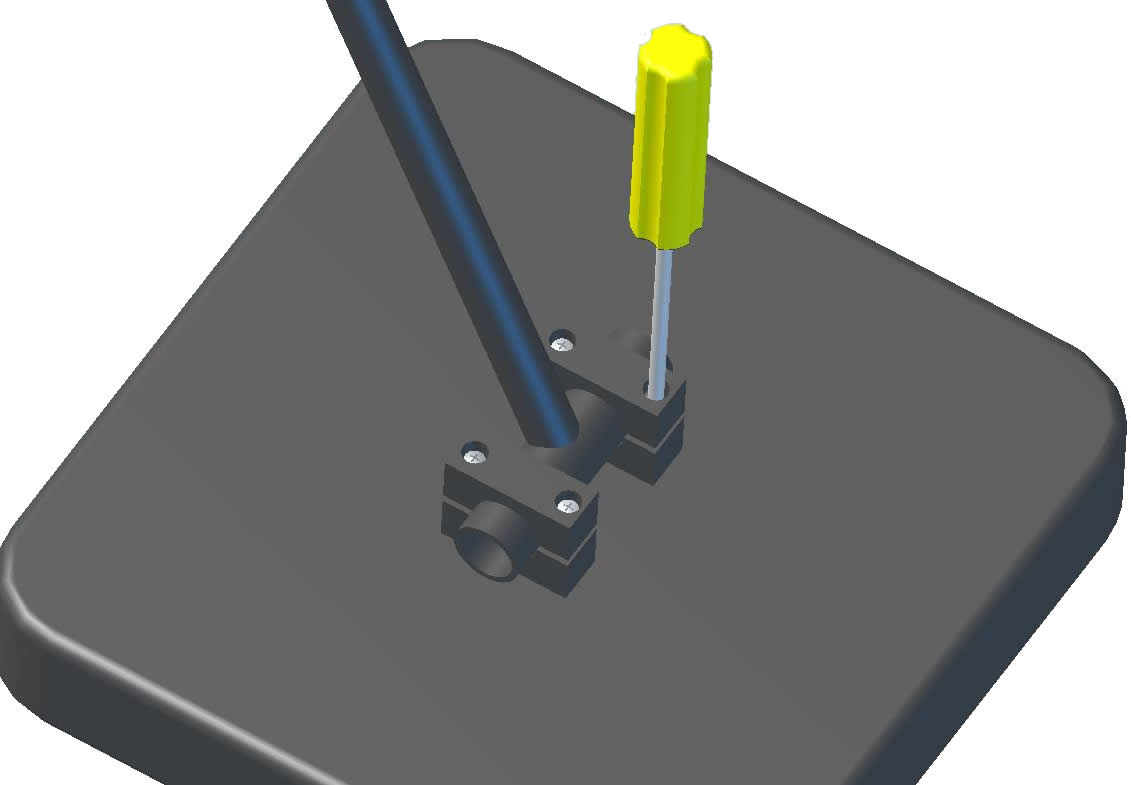 The adjustable pitch or pivot is designed so that the pad floats to the natural position of the leg, with knee bent slightly. The resistance can be adjusted under the pad where the steel "T" post connects to the underside. There are two clamps connected with four Phillips head screws. Turn screws clockwise to add
resistance, or turn screws counterclockwise to loosen.